How To Make A SIMPLE And EASY DIY Modern Dream Catcher
Making a diy dream catcher is super fun, and it can be a great way to have unique and cheap decor. This dream catcher is easy to make, and you won’t need any experience to make it.
I was inspired to make this from an Urban Outfitters dream catcher that I saw here.
Materials you’ll need…
Rather watch a video? Watch it here.

If you would like the wreath ring to be a different color, take the yarn and wrap it around the wreath ring, adding some E6000 every now and again to keep it in place.
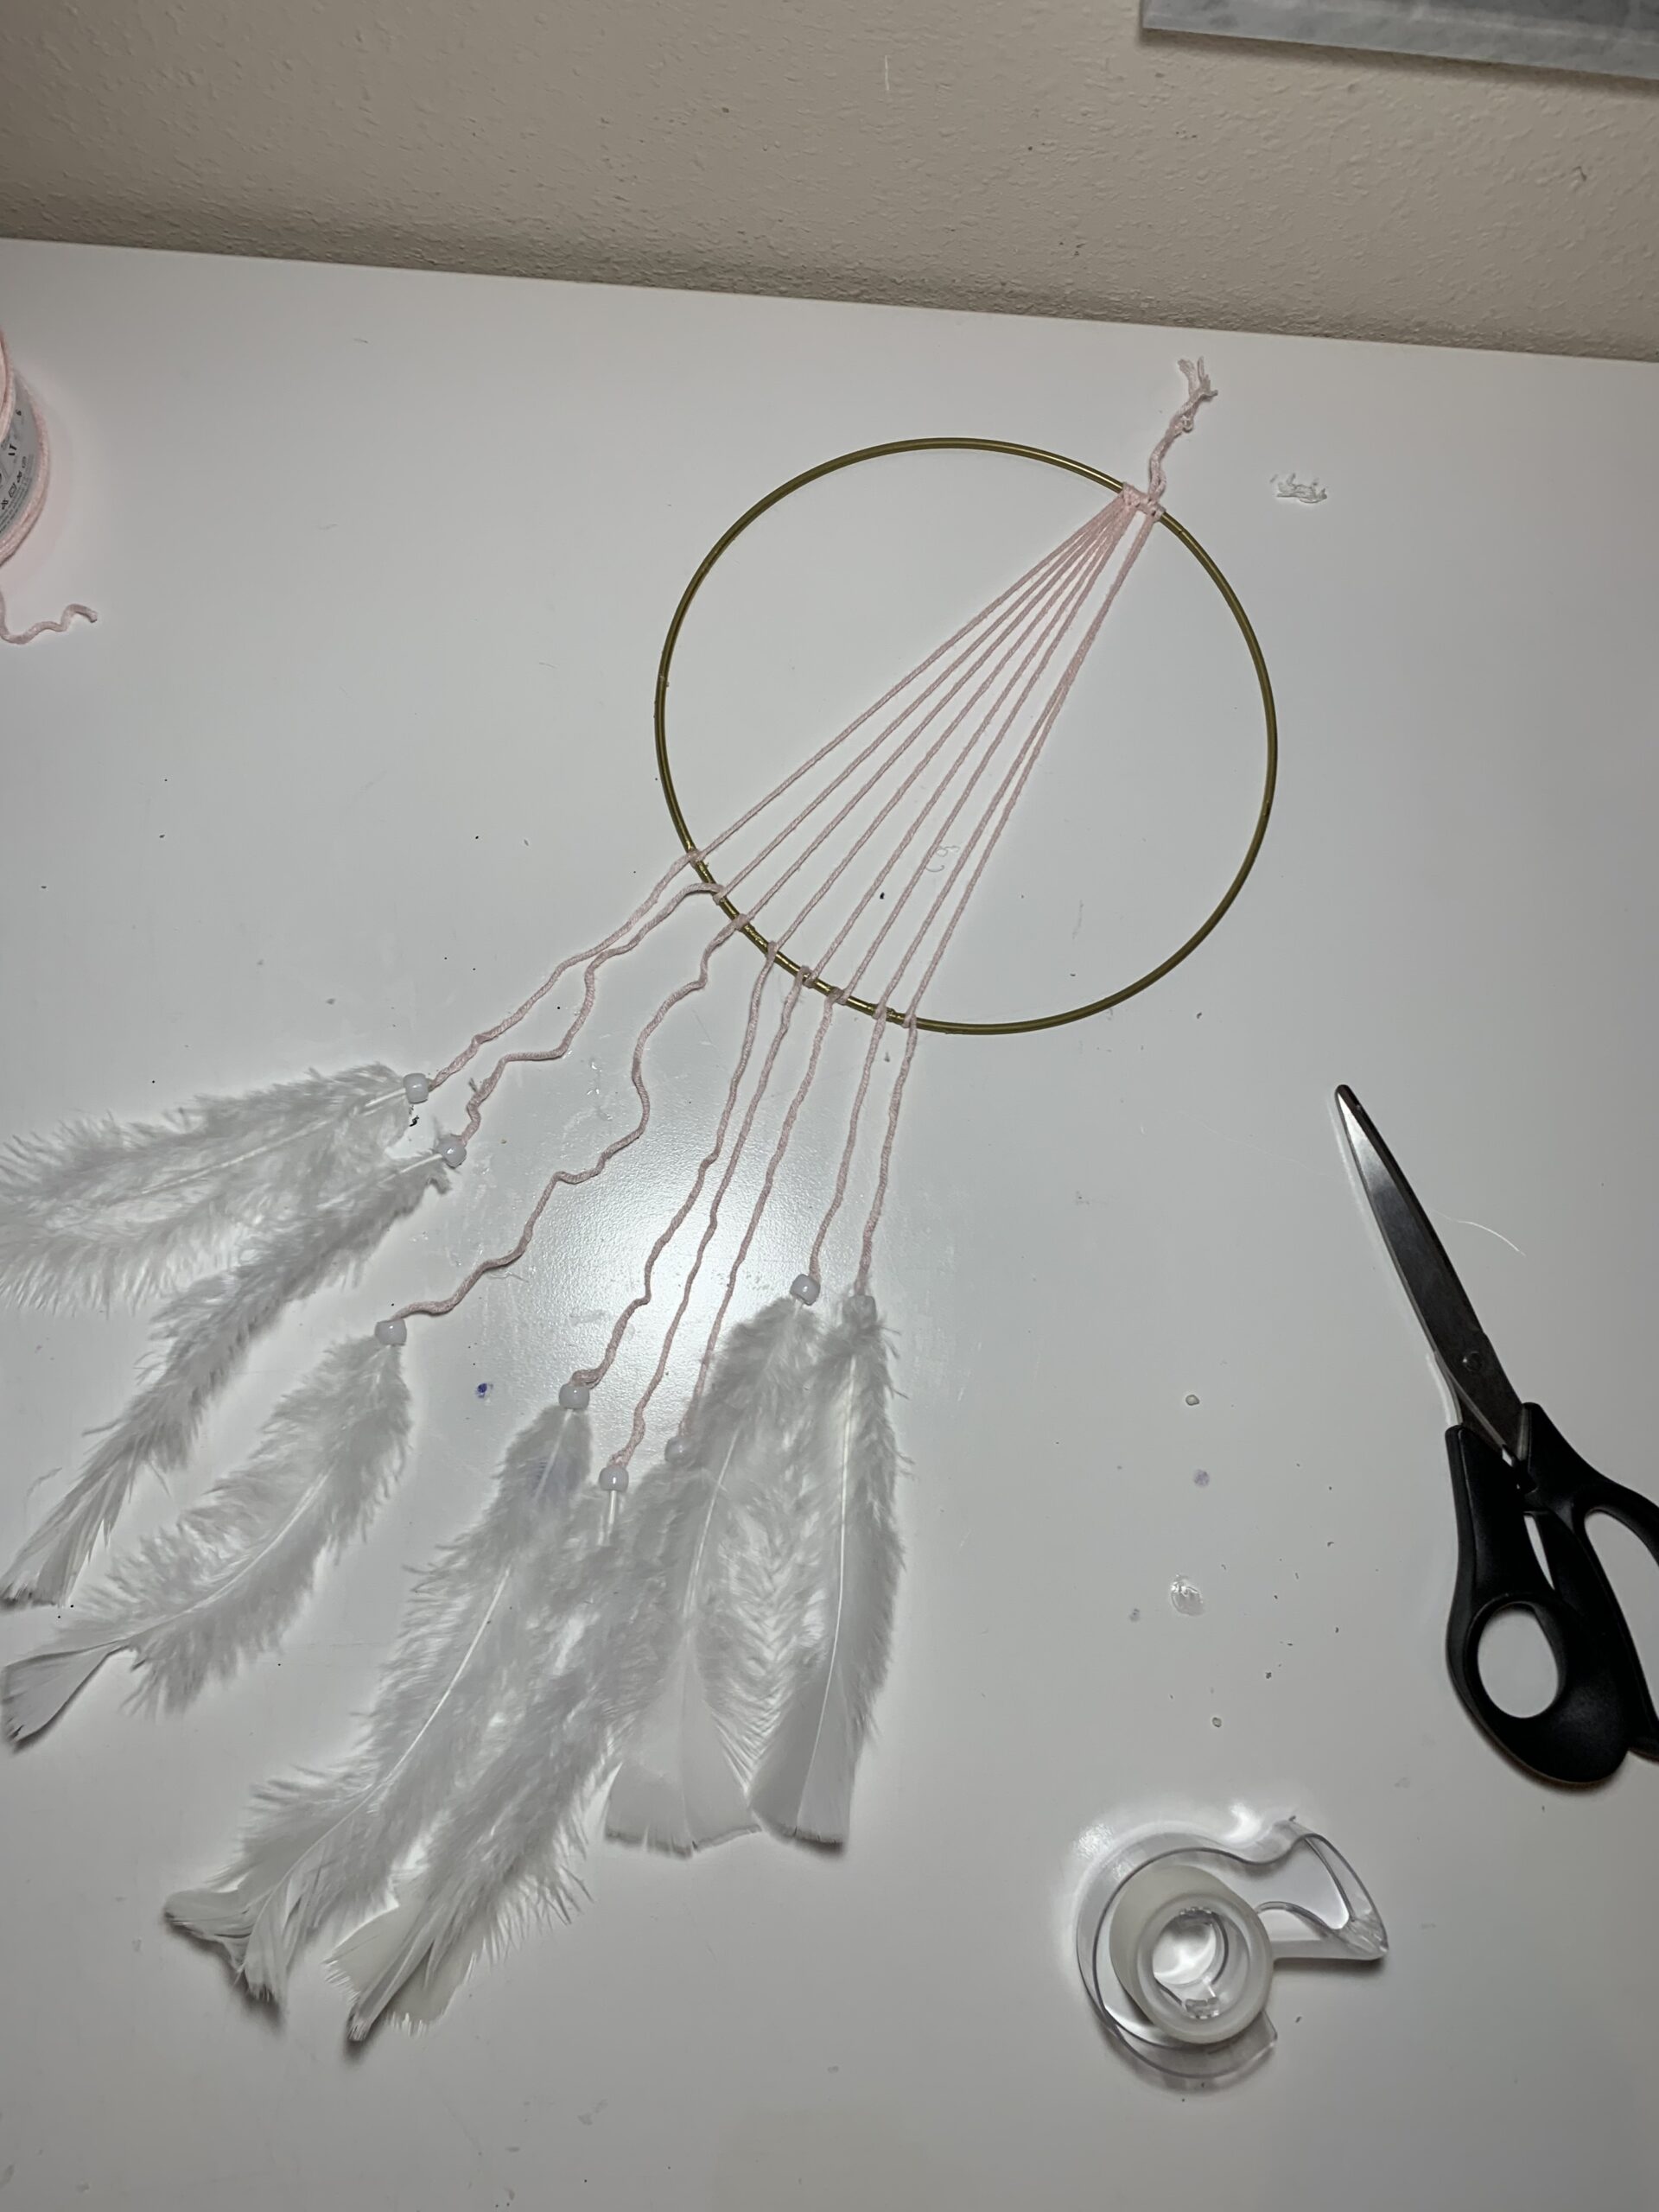
The next step is to cut pieces of yarn that are various lengths. The goal is to have them hanging down at your preferred length when folded in half and hung at the top (shown below).

Next you will place the yarn (still folded in half) on top of the ring. Now pull the folded part of the yarn down and around the ring. Then insert both ends of the yarn in the loop you just created and pull them through to tighten the knot.


If the knot is spread apart, push it together and tighten again.


Once you have done this you will now glue down the ends of the yarn. To do this, I put down some E6000 (on the wreath ring) where I wanted the yarn to end, then I wrapped the yarn around to make sure it would stay in place.


Then I did this to the other piece of yarn, and I repeated this process until I liked the way it looked.

Now for the decorative items! I started by choosing a bead then putting some glue in it. Once the glue is in there I put a feather on one side of the bead and the yarn end on the other side.


Tip: if the ends of your yarn is frayed or difficult to fit inside the bead, put a little E6000 on the end of the yarn and rub it in between your fingers. This makes the end smaller and easier to fit in the bead.

Repeat this process for all of the yarn ends.
Cut a small piece of yarn and do a knot at the top of the dream catcher, the same way you made the others. Then make a double knot at the top of this piece of yarn to make a hanger for your dream catcher.

Now your dream catcher is done!!

Thank you for reading this post and I hope it was helpful to you!
Here is all my social medias if you are interested in following me!
–Etsy
DISCLAIMER: Some links included may be affiliate links. If you purchase a product or service with the links, I may receive a small commission. Thank you for supporting Katiebeingcreative so I can continue to provide free content for you!